Wednesday, March 4, 2009

Mojito Cupcakes


After our absolute inundation with snow earlier this week, I decided some light, spring-y cupcakes were in order, hopefully to coax the last of winter along and to bring in the new season. And what's more spring-y than lime and mint? Not much, I say. Especially when you throw some rum in the mix, just for good measure.

While I'm pretty sure everyone knows what a Mojito is, I'm going to offer a quick overview of the cocktail. It's a Cuban drink and it's pretty old; while Wikipedia isn't the best source, it does say that it dates back to the sixteenth century and can alternately be called "El Draque," after Sir Francis Drake. A traditional Mojito has just three flavor components: lime, mint, and rum mixed with a little bit of sugar syrup and soda water. It's akin to a mint julep, but made with rum and has a more Caribbean flavor. But summery, no? It should knock the remaining icicles off of my roof at any rate.

But enough history (my beloved, beloved history). Onto the recipe:

Mojito Cupcakes
Adapted from Coconut and Lime's Kentucky Derby Cupcakes

Ingredient

3

6

9

12

Flour

1/4 cup

1/2 cup

3/4 cup

1 cup

Sugar

1/4 cup

1/2 cup

3/4 cup

1 cup

Butter, Room Temp

1.5 T

3 T

5 T

6 T

Milk

1/8 cup

1/4 cup

1/3 cup

1/2 cup

Light rum

1/8 cup

1/4 cup

1/3 cup

1/2 cup

Baking Powder

1/2 tsp

1 tsp

1 1/2 tsp

2 tsp

Salt

1/4 tsp

1/2 tsp

3/4 tsp

1 tsp

Egg

1/2

1

1 1/2

2

Fresh Mint

1.5 T

3 T

5T

8 T

Lime, juice and zest

1/2

1

2

4


This recipe requires some preparation before hand, but it's all fun stuff, so fear not.

Tear your mint leaves up and place in the bottom of a glass. Pour your milk over and use the back of a spoon (or a muddler, if you have it) to bruise the mint leaves. It won't look pretty, but it will smell awesome. Let sit for at least 15 minutes so the mint and milk can steep together.

Meanwhile, grate the zest off of your thoroughly washed limes (being careful not to grate your knuckles like I did). I have some sort of small grating contraption I got at Target or somesuch place for relatively cheap. It does offer a nice trap at the back to catch your grated deliciousness, but it does kind of stick to the entire grater. A microplane would be even better. Just make sure not to get any pith in your cupcakes because that would just be sour and icky. Once you've grated all of the zest off of your limes, roll your limes on a hard surface. I kind of wail on mine when I juice by hand because if not, they don't juice particularly well in my weak hands. Cut them open and squeeze the juice into a container. I tossed my zest in there too for good measure. It's all going to the same place. Your hands will smell wonderful for the rest of the day, too.

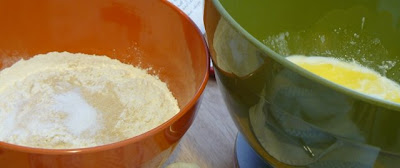
Next, do your average cupcake thing. Sift together your dry ingredients and set aside. Cream together your butter and sugar. Add your eggs and make sure it's all well incorporated.


Once your butter, sugar, and egg mixture is together, strain the mint out of your milk mixture and get rid of the leaves (I actually used dried mint because I wasn't able to get fresh at the store; it left little bits of leaf in there but it's no big deal). Add your milk mix in and then 1/2 of the dry ingredients. Next, add your rum, and then the last half of your flour. Add a tablespoon or two of lime juice to your mix; begin at 1 T for 3 cupcakes, 2 T for 6 cupcakes and so on. Save some for your frosting! Mix until well combined.

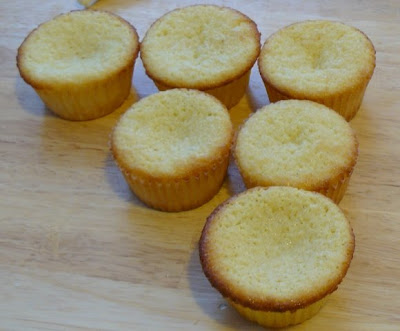
Pour into lined cupcake wells. If you're compulsive like me, you can weigh them out; I've found that for this batter, 1 3/4 oz does the job nicely: it gives a nice, round cupcake that doesn't pour over the sides and isn't too far down in the cup. Perfect.

Bake these beauties at 350 degrees for 15-18 minutes, checking after 15 minutes. Check with a toothpick for doneness. These are pretty springy, so be aware of that as well.

While your cupcakes are in the oven, prepare your frosting.

Lime-Rum Frosting
1/2 cup (1 stick) butter
1 1/2-2 cups powdered sugar
2 tsp rum
2 tsp lime juice-lime zest mix

Cream your butter until fluffy. Gradually add in your powdered sugar until smooth and aerated. Add rum and lime to smooth it out. I prefer more of a lime flavor to this, but you may wish to try more rum, as that can't hurt either. You may wish to add a few drops of green food coloring to the mix to let your tasters know they're dealing with something minty, but I preferred to leave the color out. You can see little speckles of green lime zest in there, and I preferred that to a false green.

For some reason, this was an inordinately thick frosting. I'm not sure if it was a peculiarity of the weather or the mix or whatever else, but it was difficult to pipe. I had intended to use a little star tip to make things a bit fancy, but I ended up cutting the tip off of my piping bag and just making a pretty swirl.

If I had thought ahead, I would have saved a lime and candied it in hot sugar syrup for decoration. But alas, all I have is lovely cupcakes (and my lovely cupcake apron! Thanks Xanadu in Blacksburg!)


Thursday, February 26, 2009

Not a King Cake, Day 2


Ah, yes, when we left off, our beautiful ring of dough was resting in the refrigerator. Today is the fun and delicious day, wherein you remove your beautiful, child-like ring of dough from the refrigerator, throw it into a screaming hot oven, bake it, and eat it. When you think of it, it's brutal, but the brutality of the process is redeemed because of its deliciousness.

So remove the whole thing from the refrigerator and place your whole pan in an oven that isn't turned on. Boil a few cups of water and place in a shallow pan underneath your cake/dough child, close the door and let proof for half an hour. Waiting is STILL the hard part.

Once it's proofed for half an hour, take everything out of the oven and preheat it to 350 degrees. Once the oven is ready, return your dough ring to the oven and bake for 30 minutes. Your house will smell wonderful for this part of the process and you will gain friends who want some of your yeasty-cinnamon-y goodness.

After 30 minutes, check on your ring. It should be golden brown and toasty. Alton Brown checked the temperature of his ring; it's supposed to reach 190 degrees F. However, mine clearly was a slight underachiever. It was, however, completely cooked through.


Once it's out of the oven, prep your icing. I made mine Kahlua-flavored and topped it with pecans, although I think I would mix my pecans in my frosting next time as they kind of slid off. Boo. Allow your cake to cool completely before icing.

I almost forgot to take my picture, which is why it's literally on the spatula ready to be thrown on my cake.

I had to transport mine relatively quickly so I iced my cake in its container. It was a little messy, but the slide-off icing is equally delicious. If I were to do it fancy-like, I would put it on a wire rack and put the icing on, let it sit for a while, and then move it to its final destination.

Delicious.

I had about a half cup of pecan pieces yet, so I dropped those over the top while it was still wet. They kind of slid off, but they were awesome nonetheless.

Gratuitous frosting drip-porn picture.

Enjoy! I neglected to add a baby or multi-colored sugar but you could definitely do that...were you to be making a King Cake.


Wednesday, February 25, 2009

Coffee Cake Ring/Not a King Cake, Day 1

Ok, it looks an awful lot like a King Cake. It should taste an awful lot like King Cake. It will be glazed an awful lot like a King Cake. But it's a not a King Cake. It's after Fat Tuesday and serving this cake after Mardi Gras is apparently tantamount to sacrelidge. I don't want Emeril Lagasse to come after me with a crawfish or something. But it's tasty nonetheless.

I'm using two of Alton Brown's recipes from the House of the Rising Bun Recipe: his overnight cinnamon rolls for flavor, and his overnight Citrus-Ginger Ring for the shape (because it's a ring, not a King Cake.)

The Bread:
4 large egg yolks, room temp (save your whites for later!)
1 whole egg, room temp
2 oz sugar
3 oz unsalted butter, melted
6 oz buttermilk, room temperature (I didn't have any so I substituted 6 ounces half and half with about 3/4 T of vinegar)
20 ounces All Purpose Flour
1 package instant dry yeast
1 1/4 tsp kosher salt
A few sprays cooking spray

Whisk yolks, eggs, sugar, butter, and buttermilk together. Sift together Flour, salt and yeast.

Wet and Dry ingredients...

Add approximately half of the flour along with the yeast and salt; whisk until moistened and combined. Add all but about 3/4 cup of the flour mix.

Now, if you're not a lowly graduate student like myself, you may have your own handy stand mixer. Unfortunately, I do not have such luck and have to hand knead everything. So knead for either 5 minutes by stand mixer or about 10 by hand.

Kneading action shot.

If you have a stand mixer, check your dough after 5 minutes. It should be moist and soft to the touch but not sticky. If it is sticky, add the remaining flour and continue to knead for an additional 5 minutes by stand mixer or 10 by hand.

My wrists are so shapely.


After you're finished kneading (I kneaded for the majority of a Jon and Kate Plus Eight episode), form your dough into a ball. Spray a large bowl with cooking spray and drop your dough in. Spray the top of your dough and allow to sit for 2 to 2 1/2 hours in a nice warm spot to proof. I took this opportunity to cook and eat my dinner, which conveniently kept my dough warm.

Once you're finished with dinner but ideally before your dough has proofed, mix together your filling:

The Filling:
8 oz brown sugar
Pinch salt
1 T cinnamon

Mix together and set aside.

Once your dough has doubled, drop onto a lightly floured surface and roll it out to a 12 by 18 inch rectangle. Melt 3/4 oz butter in the microwave and spread over your dough rectangle.


Once your butter is spread over your dough, spread the filling over your dough and press in lightly.

I neglected to take pictures of the next portion of the process. I would like to say it was because it was so complicated that I couldn't possibly pick up a camera, but I simply forgot. Beginning at the bottom edge, begin to roll the dough up toward the unbuttered part of the dough. Roll it into a tight cylinder, making sure the seam is on the bottom. Gently squeeze to even out any uneven parts in the dough to make an even cylinder. Pull ends together to form a ring and dab a little bit of beaten egg on the ends to help seal everything together.

And now the hard part. Put in the refrigerator to sit overnight or up to 16 hours. Waiting is always the hardest part.


Thursday, February 19, 2009

Rosewater-Pistachio Cupcakes, or, Magic Cupcakes

Rosewater doesn't particularly intimidate me. It's an auxiliary flavoring ingredient in a lot of Greek cooking (namely, baklava), and growing up near a Greek neighborhood, you got a lot of it in odd places. For example--rice pudding with rosewater? Killer. Seriously. Absolutely amazing stuff (although I think that incarnation is more of an Egyptian thing). When I saw these cupcakes, I knew I wanted to make them for myself but I was rather anxious about the reception from other tasters. I whipped up a half batch on a Sunday afternoon and then contemplated who to spring them on. The logical choice was graduate students, which I did. Little did I know that these weren't merely rosewater-pistachio cupcakes, but they were in fact magic cupcakes. To my surprise, they were well received. Incredibly well received in fact. I warned tasters ahead of time that they contained rosewater as a flavoring, and that some people might think it tastes like perfume. They couldn't get enough of them; I got no complaints, puckered faces or the dreaded "oh how...interesting." One friend loudly lament the fact that he missed his opportunity to taste one, and then proclaimed me a goddess.

I then brought them to a local organization where I volunteer as a researcher. The next day, they solemnly called me back and declared me the official baker for the Institute. These cupcakes are just that good.

These are also sinfully easy. I'd almost call them "plop" cupcakes because you can basically plop everything together in a bowl and have fantastic results.

Adapted from Vegan Cupcakes Take Over the World

Ingredient

3 Cupcakes

6 Cupcakes

12 Cupcakes

24 Cupcakes

Vanilla Yogurt

2 oz

3 oz

6 oz (1/2 cup)

8 oz

Milk

1 1/3 oz

2 2/3 oz

5 1/3 oz (2/3 cup)

10 2/3 oz

Canola Oil

2/3 oz

1 1/3 oz

2 2/3 oz (1/3 cup)

5 1/3 oz

Sugar

1.75 oz

3.5 oz

7 oz (3/4 cup + 2 T)

14 oz

Rosewater

2/3 TBSP

1 1/4 TBSP

1 1/2 TBSP

3 TBSP

AP Flour

1 1/8 oz + 1/2 T

2.25oz + 1 T

4.5oz + 2T (1 Cup +2 T)

9 oz + 4 T

Corn Starch

1/2 TBSP

1 TBSP

2 TBSP

4 TBSP

Baking Powder

1/8 tsp

1/4 tsp

1/2 tsp

1 tsp

Baking soda

1/8 tsp

1/4 tsp

1/2 tsp

1 tsp

Salt

Pinch

1/8 tsp

1/4 tsp

1/2 tsp

Pistachios, chopped

2/3 oz

1 1/3 oz

2 2/3 oz (1/3 cup)

5 1/3 oz

Note: I didn't have any issue making these with the cup to ounce conversion as a half-dozen; however, my dozen turned out a little flat, but still deelicious.

Mix together yogurt, milk, oil, sugar and rosewater in a large bowl.

Sift together flour, corn starch, baking powder, baking soda and salt. Slowly whisk into the wet ingredients. Fold in pistachios.

Drop into cupcake liners and bake for 18-23 minutes at 350. Avoid licking the bowl.


I did a test run of two cupcakes before I baked the entire thing (after my honey-sesame related fiasco, wherein my batter attempted to overtake my oven). 2 ounces of batter worked best for me, but I would suggest beginning at 1.5.

These guys didn't pop up much in the oven and retained pretty flat tops. However, that just makes an apt platform for more pistachios.


My wee-small taste-test muffin was up in the top corner. mmm.


Rosewater frosting
1 T butter
1.5-2 cups powdered sugar
1.5 T rosewater
Milk to thin.

Cream the butter, add the sugar, make it smooth with milk and rosewater.


Rosewater is a strong flavor; it does smell like perfume, but I like its taste nonetheless. However, I think piling on a ton of rosewater frosting would do a disservice to these beauties, so I opted for a thin layer.


I think the best part is the pistachios on top. I was going to try for something elegant and centered but they, homestyle frosting. That's not how Mom would do it; she would dunk these guys. So I followed suit.


mmm, perfection. My new favorite flavor combination.

Monday, February 16, 2009

Red Velor Cupcakes


Red Velvet, for some reason, eludes me. I've tried just about every recipe under the sun and have gotten everything from watery, blood-red, vaguely chocolate-y pudding to unleavened vaguely chocolate bricks hard enough to serve as ammunition when hunting small animals. Unfortunately, it's also my Dad's favorite, and most of his past few years of birthday cakes have been virtually inedible. (But at least the frosting is delicious, right?) When I was doing small test batches of these beauties, I encountered more of the same issues. Beautifully red cakes would be rock-hard, dense chocolate biscuits. Cakes that were airy and light when coming out of the oven would collapse under their own weight, leaving me absolutely cresfallen and feeling like an absolute failure of a baker.

After so much consternation (and after a slight feeling of panic), I decided to make my standard, go-to recipe but substitute in red velvety goodness. I added a touch of chocolate, buttermilk and vinegar and hoped for the best, and after four failed batches, was finally rewarded.

Red Velor Cupcakes

Ingredient

2 Cupcakes

4 cupcakes

6 cupcakes

12 cupcakes

24 cupcakes

Unsalted Butter

1 T

2 T

3 T

6 T

12 T

Sugar

1 oz

2 oz

3 oz

6 oz

12 oz

Beaten egg

1 TBSP

2 TBSP

1

1

2

Flour

1.33 oz

2 3/4 oz

4.25 oz

8.5 oz

17 oz

Baking powder

pinch

1/8 t

2/3 tsp

1 t

2 t

Baking soda

pinch

1/8 tsp

2/3 tsp

1 t

2 t

Vinegar


1/8 tsp

2/3 tsp

1 tsp

2 tsp

Salt

Pinch

Pinch

1/8

1/4 t

1/2 t

Buttermilk

1 oz

2 oz

3 oz

6 oz

12 oz

Cocoa Powder

2 tsp

4 tsp

6 tsp

12 tsp

24 tsp


Sift together flour, cocoa, salt, baking powder and baking soda. Set aside.

Mix together buttermilk and vinegar. Set aside.

Cream together room temperature butter and sugar. Add egg and beat well.

Add 1/3 of wet mixture and 1/3 of dry mixture at a time, beating well after each incorporation.

Pour into prepared cupcake cups (1.75 oz's for nice, rounded cupcakes; 2 oz's for fuller cupcakes like pictured).

Bake for 18-23 minutes until the centers are finished.

Enjoy.


And the best part of red velvet is, of course, the cream cheese frosting, which is also quite possibly the best-est, easiest, tastiest frosting ever, and doesn't even require a recipe. Mix together a half-brick (4 oz) of cream cheese, 2 TBSP (1 oz) butter and thicken it out with confectioner's sugar, et voila, magic!

Top with red sprinkles for awesome Valentine's Day love, or eat with a spoon...either way is delicious.